Technical practice
Streaming
One of the key parts of the eSports industry at the moment is the ability to stream high quality video of competitive games as they are going on. As typically it is a constantly evolving industry the audience largely prefers that the content is streamed live.
Streaming relies very heavily on the capability of your computer. The amount of cores that you have , RAM that you have and the video capability are all massive factors of how the stream will go on any given computer not to mention the clock speed of the CPU(s) and the RAM. Then how many sources your computer is capable of running at once are a large factor also. This section will inform of the technique of streaming, how to do it, what software is optimal and tips for making your computer able to do it, if it is not.
There are two main ways of streaming that I have tried whilst producing this project. The first is a free-ware video capture tool such as VH Capture and adobe media live encoder. And the other is using a all-inclusive package known as Xsplit.
Things that you will need in order to stream
-
An incredibly fast computer depending on intended the quality of your stream
-
A fast internet connection
-
Streaming software
-
External Hard drive (Optional for saving video as backup)
-
Overlays
-
Transitions
-
Webcam & Microphone (Optional)
-
Content
-
Multiple screens (optional)
-
Account on a host site
Bit rate explained
Bytes are made up of bits. There are 8 bits to a byte 1000 bytes to a Kilobyte 1000 KB to a MB and so on. If you have a bitrate set at 1000kbps you will find yourself needing a transfer speed of 1MB per second to avoid lag or rubber banding. However as these speeds are easy for a modern CPU to achieve you can afford to set your initial bitrate higher than that of your upload bitrate. However, this doesn’t mean that it will not put strain on your computer as whilst streaming you will have to be running the source, and the encoding software, to reduce how much effect capturing has on your computer go to the tips&tricks section of optimising your computer.
Adobe media encoder and Video capture software
This method isn’t my preferred as finding a programme that works well with media live encoder is fairly difficult. Because of the capture software being free ware it inevitably holds a larger margin for crashes because of lack of money for rolling support for the software, the video capture software that I used (VH Capture) hasn’t been supported by the company that produced it for months. But never the less I will outline the technique as this was the rudimentary way that I first tried to stream my content.
This is however the preferred way of streaming for people who have no budget to work with because although slightly unstable, it is free.
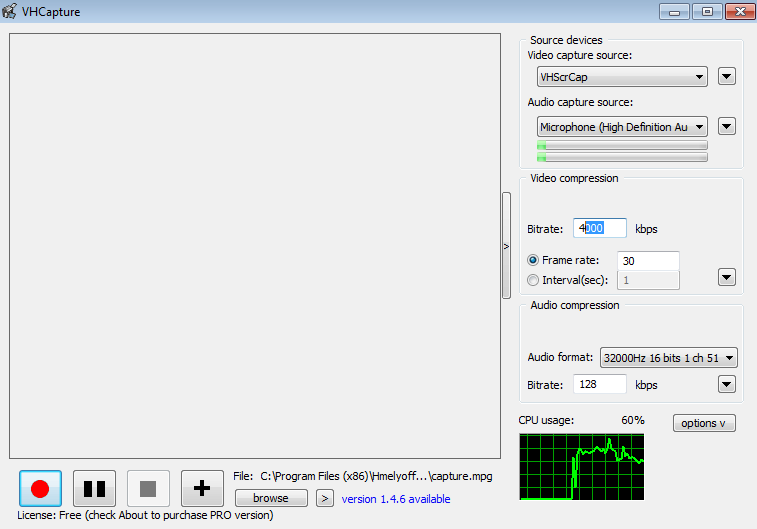
Above you can see the interface for VH Capture, It has the option to pick form many capture devices that you may have installed on your computer, Options to change bitrate for both video and audio and a diagram of CPU usage also there is a large preview screen that can be minimised using the arrow to the right of it.
The bitrate of your capture device should be much higher than that of the encoding device. Primarily so the capture device is putting out good quality in the first place as the encoding software will greatly reduce the quality of video.
Once you have the Capture device set up in a way that suits your computer's performance, and obviously what you want to do with the stream it is time to set up Adobe Media live encoder.
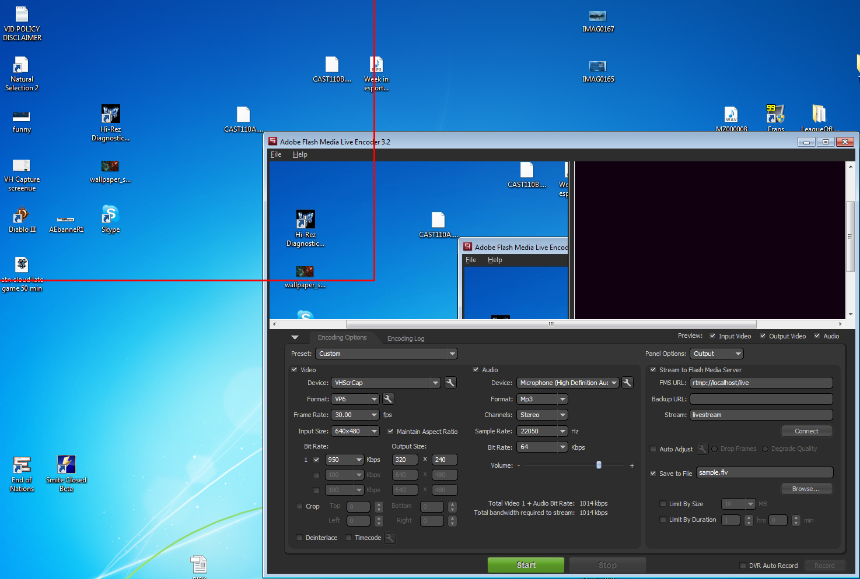
Above is an overview of what Media live encoder looks like, you have various options to change like input size output size audio options bitrates of both audio and visual and on the right you have the FMS options , they determine where your stream is going. But perhaps most importantly the red box in the top left corner shows you what part of the screen VH capture is currently capturing, this makes gives a good impression of where about you should put your content, you can make the input resolution larger to increase the space in the red box, but be warned this will put strain on your PC.
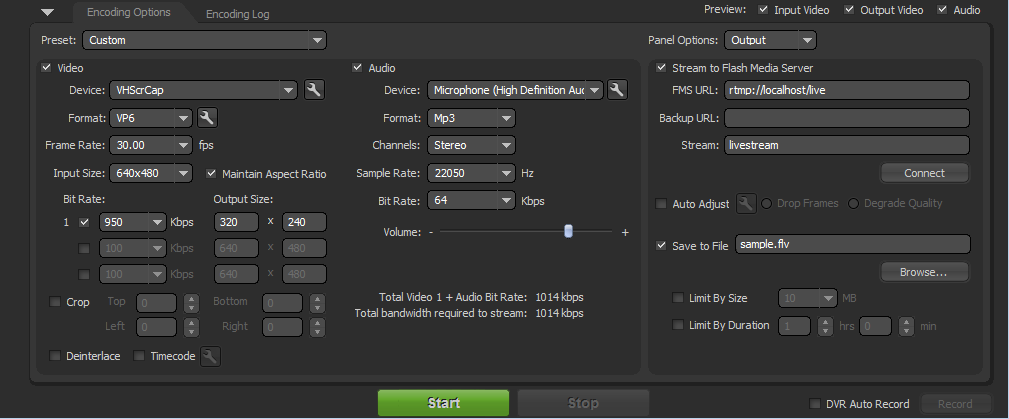
Here we have a close up view of the encoder options, keep in mind that setting a bit rate that is too high can lead to problems in streaming at this point once the bitrate and input settings are done you have to set up your host for the stream there are many hosts that you can use online, these include Livestream, Ustream, Twitch.TV and so on. You also have the option to save the recording as you are streaming it but be warned, this again will put a massive strain on your computer, a generally accepted rule to avoid issues like this are to use a external hard drive, or at least a different hard drive to the one you are running your various programmes off.
Setting up a host
Your stream has to go somewhere, and as mentioned in the previous paragraph there are several places you can host streams at. You need to sign up with these websites and get your FMS url. Most good streaming websites have a built in 'dashboard' for streaming that lets you control several aspects of it, like chat functions and so on. Once this is set up and you have your content inside the input area, press start on adobe live encoder and broadcast (or its equivalents) on the dashboard of the hosting website. You will then be streaming live to the internet.
Xsplit
Another programme commonly used for streaming is Xsplit although this isn’t free it is definitely a solid alternative, as it is more stable, and a all in one package so it actually drains less power from your system. First thing to do is to either buy a licence for it or get the trial version.
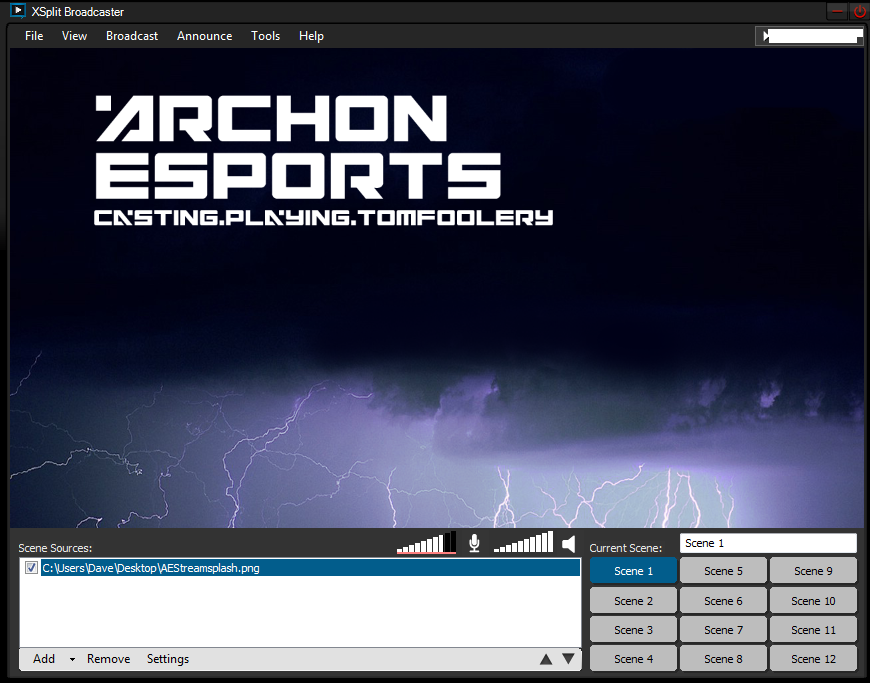
Above is what the current version of Xsplit looks like. With various 'scenes' that you can add sources to these scenes can also be hot keyed with transitions so it has a vision mixer feel to it. The sources can be images, games, movie files, or basically anything that isn’t executable. As you can see I have added an image just for the purpose of showing the functionality.
By going Broadcast>Edit channels>Edit you can get to the channel properties, this is much like the Adobe media live encoder options that we looked at earlier.
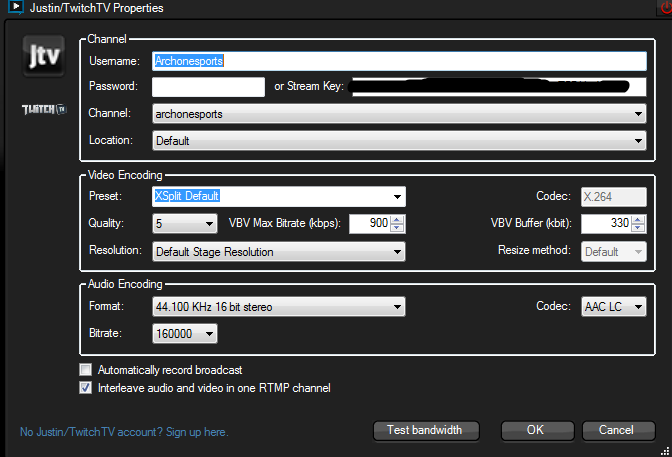
It is at least a little simpler than Adobe live encoder. You set the quality of output, resolution (if you like) bitrates and the channel options. These options rely a lot more on the capability of your internet connection so there is a test bandwidth option that will save you from going to bandwidth testing sites such as speedtest.net. When all your sources and options are in order all you have to do is click the channel you want to use under broadcast on the main screen and it will be sending to the host site.